Using Your Camp Kitchen Lid as a Prep Surface: Counter Space Without Extra Gear

Every camp cook eventually learns the same lesson: the stove is rarely the problem — the missing counter is. Here's how the lid of a modern camp kitchen box quietly solves the oldest annoyance in outdoor cooking, and how to set yours up so it works like a real countertop.
Counter Space Is the Real Bottleneck at Camp
Think about the last time you cooked at a campsite. The stove had a home. The cooler had a home. But the cutting board? It ended up balanced on a cooler lid, wedged onto a corner of the picnic table between someone's coffee mug and a bag of buns, or — worst case — on your lap in a camp chair.
The picnic table itself is part of the problem. A standard picnic table stands about 30 inches tall, with most falling between 28 and 32 inches. Home kitchen countertops are built at 36 inches for a reason: that height lets an average-height adult chop and prep standing upright without hunching. Six inches doesn't sound like much until you've spent twenty minutes bent over a picnic table dicing onions and peppers for fajitas. Your lower back notices.
Add in the other realities — tables slick with morning dew, boards that slide on uneven planks, raw chicken juice heading toward the spot where your kids will eat dinner — and it's easy to see why "where do I put the cutting board" is the first problem worth solving in any camp cooking setup.

How a Camp Kitchen Lid Becomes a Counter
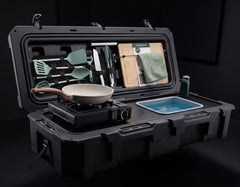
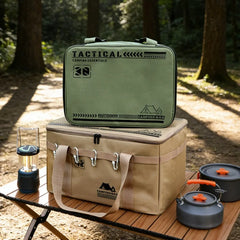
This is where an all-in-one camp kitchen box earns its keep. On the VOZ Camp Kitchen, the case measures 47.6 by 19.3 inches closed — which means the moment you pop the three latches and lift the lid, you expose a work deck of just over six square feet at the top of the case. The case is molded from LLDPE food-grade plastic, the same class of polymer used in industrial food containers, so the surface you're working over is designed to be around food in the first place.
The kit builds on that deck with two pieces that matter for prep work: a removable countertop and a cutting board with a strap that keeps it anchored instead of skating around while you chop. Because the whole system — stove, collapsible sink with a USB-rechargeable faucet, 2-gallon water tank, utensils, and 30+ other items — packs inside the same case, your prep surface, wash station, and burner all deploy together. If you want the full item-by-item rundown, we've broken down everything included in the camp kitchen kit and why each piece is there.


Compare that with the classic alternative: hauling a separate folding table, a loose cutting board, a wash bin, and a stove stand, then assembling them into something kitchen-shaped. A box with a working lid collapses all of that into one carry and one 15-second setup.
Setting Up the Lid Workstation: Think in Three Zones
Restaurant line cooks organize their stations so every movement is short and repeatable. You can do the same thing on a camp kitchen deck. Divide the surface into three zones and keep them consistent every trip:
- Prep zone. The cutting board lives here, strapped down, closest to your dominant hand. Keep the knife, a small scrap bowl for trimmings, and whatever you're cutting next within reach. A scrap bowl saves you a dozen trips to the trash bag.
- Cook zone. The stove gets its own territory, downwind of where people gather if there's a breeze. Staging cooked food between the burner and the prep board means nothing raw ever has to cross over the finished plates.
- Wash zone. The sink and faucet anchor the far end. Rinsing produce, wetting a towel to wipe the board between tasks, and washing hands after handling raw meat all happen without leaving the station.
The zone habit does more than speed you up. It keeps raw and ready-to-eat foods physically separated, which is the single most important cross-contamination control you have outdoors. And because the layout is the same every time you open the box, anyone in the family can find the tongs without asking.

Keeping the Lid Surface Food-Safe
A prep counter is only as good as its hygiene, and campsites are harder on food safety than home kitchens. The USDA defines the bacterial danger zone as 40°F to 140°F — the range where bacteria can double in as little as 20 minutes. Perishables shouldn't sit out more than two hours, and that window shrinks to one hour when the air temperature tops 90°F, which describes most summer afternoons at camp. A lid workstation helps here simply by being fast: less time assembling your kitchen means less time ingredients spend sitting in the sun.
For the surfaces themselves, follow the same USDA cutting board guidance you'd use at home:
- Use separate boards — or at minimum separate board sides and a full wash between — for raw meat and everything else.
- After cutting raw meat, poultry, or fish, wash the board, knife, and the lid surface under it with hot, soapy water. This is exactly what the built-in sink and faucet are for.
- For a deeper sanitize, the USDA recommends flooding a plastic board with a solution of 1 tablespoon of unscented liquid chlorine bleach per gallon of water, letting it stand several minutes, then rinsing and air drying.
- Retire any cutting board that's developed deep, hard-to-clean grooves.
A smooth polymer deck has a real advantage over a weathered picnic tabletop here: no cracks, no old food residue from the last dozen campers, and no mystery stains. You know its history because it rode in with you.
When One Lid Isn't Enough: Extending Your Counter
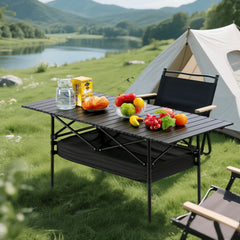
For a solo camper or a couple, the lid deck plus cutting board covers nearly all prep work. Feeding a bigger crew — or running a multi-dish dinner at a week-long base camp — usually calls for a second surface. A folding camp table beside the kitchen box gives you a landing zone for serving dishes and a place for a helper to work without crowding the cook. Our camp tables collection covers everything from roll-up aluminum tables that pack into a slim carry bag to adjustable-height folding side tables that stow flat against a truck bed wall.


The rule of thumb: the box's lid is your working counter, and any added table is your staging counter. Keep knives and raw ingredients on the lid where the strap-down board and sink are, and let the table hold finished food, plates, and drinks. If cargo space is tight, weight and packed size deserve as much attention as surface area — a topic we covered in depth in our guide to why size and weight matter in a portable camp kitchen.
FAQ
Can I cut food directly on the camp kitchen lid?
Use the included cutting board rather than cutting straight on the case. Knife work directly on the lid will scratch the polymer over time, and those scratches become harder to clean. The strap-down board protects the deck and gives you a surface you can carry to the sink or swap out after handling raw meat.
How much weight can I put on the lid work surface?
Treat it like a counter, not a bench: cutting boards, mixing bowls, a loaded plate or two. Keep heavy coolers and water jugs on the ground, and don't sit or stand on the case. The case itself is engineered to protect 30+ items inside during transport, but concentrated loads on an open lid are a different stress than a packed, latched box.
Is a lid prep surface stable enough for real knife work?
Yes, provided the box sits level. Set the case on firm, flat ground or a sturdy table, and check for wobble before you start cutting. The cutting board strap does the rest — that anchoring is the biggest practical difference from a loose board sliding on picnic-table planks.
What's the fastest way to get the whole station ready?
With an all-in-one box, the sequence is: level spot, pop the latches, lift the lid, set the board and stove in their zones. The kit is designed to go from packed to cooking in under 15 seconds — we timed the full sequence step by step in our setup guide.
Ready to upgrade your camp kitchen?
The VOZ Camp Kitchen includes everything you need in one weatherproof case. Sets up in 15 seconds.
Shop VOZ Camp Kitchen →