How to Season a Camp Kitchen Frying Pan Without Ruining It

A camp kitchen frying pan only earns its keep when it's seasoned right — and most ruined pans get ruined at home, not at the campsite. Use the wrong oil, the wrong heat, or the wrong cleaning habit, and a perfectly good skillet turns into a flaking, sticky mess inside a season or two.

First, figure out what kind of pan you're seasoning
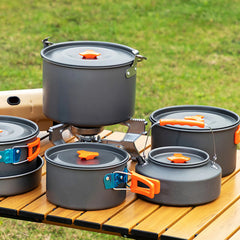
Seasoning advice is not one-size-fits-all, and the first mistake people make is treating every camp frying pan the same. Three materials show up in most camp kitchens, and each one wants something different from you.
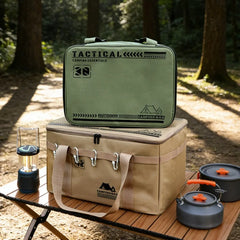
The VOZ Camp Kitchen ships with a non-stick frying pan that doesn't need traditional seasoning, but its stove platform is rated for cast iron, so a lot of cooks bring an iron skillet along too. The rest of this guide is written for cast iron and carbon steel — the two pans that actually want a seasoning layer.


The four mistakes that ruin a seasoning layer
Most "ruined" pans aren't actually ruined. They've been mistreated in one of these four predictable ways. Spot the pattern, fix the habit, and the seasoning rebuilds itself.
- Too much oil. A thick coat won't bake into the metal — it bakes into a sticky, splotchy varnish that sits on top of it. Fresh Off The Grid's seasoning guide is blunt about this: excess oil creates sticky, splotchy finishes instead of a glossy nonstick surface.
- Storing the pan damp. Both cast iron and carbon steel will flash-rust overnight if put away with any moisture left on them. Dry the pan with heat after washing — over a burner, not just with a towel.
- Scouring too aggressively. Steel wool and metal scrapers strip seasoning down to bare iron. Use a chainmail scrubber or a stiff nylon brush instead.
- Long simmers of acidic foods. Tomato sauce, wine reductions, and citrus dishes gradually break down the polymer coating. A quick acidic sear is fine; an hour-long simmer in a fresh-seasoned pan is not.
The right oil — and why flaxseed isn't it
Seasoning is a chemistry trick called polymerization. When you heat a very thin layer of unsaturated oil on iron, the fatty acid molecules cross-link into a hard, plastic-like polymer that bonds to the surface. PBS NOVA frames it plainly: it's a chemical reaction, not just oil sitting on metal.
For a while, food bloggers pushed flaxseed oil as the holy grail. Flaxseed is a true "drying oil" — the same family of oils used in wood finishes. The catch is that flaxseed's smoke point is only around 225°F, far below the temperature where seasoning actually wants to live, and the resulting coating is famously brittle. The Kitchn's side-by-side test of five seasoning oils concluded grapeseed produced a notably smooth nonstick surface, while flaxseed-seasoned pans were prone to flaking.
Lodge, for what it's worth, doesn't reach for anything exotic. Their own test kitchen uses vegetable or canola oil for at-home seasoning, and they explicitly advise against beef tallow, lard, or ghee for seasoning because those fats can go rancid in storage (they're fine for cooking).
| Oil | Smoke point | Seasoning verdict |
|---|---|---|
| Grapeseed oil | ~420°F | Best overall: high polyunsaturated fat, neutral flavor, easy to find |
| Vegetable or canola oil | ~400-450°F | What Lodge uses at home. Affordable, works well, easy to source |
| Flaxseed oil | ~225°F | Skip. Coating looks great briefly, flakes badly later |
| Beef tallow / lard / ghee | varies | Lodge advises against these for seasoning — can go rancid. Fine for cooking |
How to season a cast iron or carbon steel pan at home
This is the one place you don't want to improvise. Do it in an oven where you can hold temperature steady — campfire seasoning is for touch-ups, not foundational coats.

- Wash the pan with warm water and a small amount of mild dish soap. Modern dish soap is no longer lye-based and won't strip a built-up seasoning in normal amounts — the no-soap rule dates back to the lye era. Scrub off any rust with a stiff brush.
- Dry it completely. Put the pan on a burner over medium heat for two or three minutes until the last traces of water steam off. Damp iron rusts in hours.
- Add about a teaspoon of grapeseed (or vegetable or canola) oil to the pan. Rub it over every surface — interior, exterior, handle, underside — with a lint-free cloth or paper towel.
- Wipe it off. Really wipe it off. The pan should look almost dry, not wet. If you can see a glossy oil layer, you've used too much.
- Place the pan upside down on the middle oven rack with a sheet of foil on the rack below to catch drips. Bake at 450–500°F for one hour.
- Turn the oven off and let the pan cool completely inside the oven — at least one to two hours.
- Repeat steps 3 through 6 at least two more times. Three thin coats beat one thick coat every single time.
Touching up the seasoning at camp
Once a pan is built, you maintain the seasoning on the trail with almost no effort. After cooking, while the pan is still warm (not cold-water shocked — that's how cast iron cracks), wipe it out, give it a quick rinse if needed, and put it back on the stove or near the fire to dry.
Then rub a near-invisible smear of cooking oil into the cooking surface with a paper towel. You're not seasoning — you're protecting. This is sometimes called "feeding" the pan, and it's why old camp skillets keep getting smoother instead of worse.
Cleaning without stripping the seasoning
The single best cleaning tool for a camp cast iron pan is heat. After cooking, leave the pan over residual heat and scrape food off with a wooden or silicone spatula. Most of the time, that's all you need.
When something is genuinely stuck:
- Coarse salt and a paper towel work as a gentle abrasive that won't dig into seasoning.
- A splash of warm water on a warm (not hot) pan, with a stiff nylon brush, lifts the rest.
- Never dump cold water onto a hot pan. Thermal shock can crack cast iron outright.
- Dry the pan on the stove or by the fire — never just air-dry it.
KOA's cast iron care guide and Amanda Outside both make the same point: heat sanitizes a cast iron pan more thoroughly than soap ever could, because every cleaning cycle ends with the pan back on a burner well above the kill threshold for foodborne bacteria.
FAQ
Can I season a brand-new pan over a campfire instead of an oven?
You can do touch-ups over a campfire — a thin coat of oil warmed until it stops smoking — but a from-scratch seasoning needs steady, even heat for a full hour at 450–500°F. A campfire's heat is too variable to build the first three foundational coats. Always start a new pan in the oven at home.
How do I know if my pan needs to be re-seasoned?
If food sticks where it never used to, if the surface looks gray or patchy instead of dark brown/black, or if you see visible flaking, it's time. Wash, dry, oil thinly, and bake one full cycle. A well-cared-for pan usually only needs one round to come back.
Does soap really not damage seasoning?
Modern dish soaps don't contain lye, so a small amount won't strip a properly built seasoning. That said, there's no upside to soap on a freshly-cooked pan — heat and a scraper handle the vast majority of cleanup. Save the soap for the times you actually need it: raw fish, sticky sugar messes, anything you'd rather not re-flavor your next meal with.
Can I use my own cast iron pan on the VOZ Camp Kitchen stove?
Yes — the VOZ Camp Kitchen's stove platform is rated to support cast iron, so a 10-inch skillet sits comfortably over the burner. Just make sure the pan is dry before it goes on, and never lift it by the handle until it's cooled enough to grip safely with a bare hand.
What about non-stick pans — should I season those?
No. PTFE and ceramic coatings are the cooking surface. Adding oil-baked layers on top either flakes off or damages the underlying coating. Treat non-stick pans gently, keep them on low or medium heat only, and replace them when the surface wears.
The takeaway
A camp kitchen frying pan that's been seasoned right is a 30-year tool. The whole job comes down to four habits: thin coats of the right oil, three baking cycles before first use, dry storage, and heat-first cleaning. Skip none of them, and the pan only gets better the more you cook on it.
Ready to upgrade your camp kitchen?
The VOZ Camp Kitchen includes everything you need in one weatherproof case. Sets up in 15 seconds.
Shop VOZ Camp Kitchen →