Cold-Weather Camp Kitchen Care: What Freezing Actually Breaks (and How to Prevent It)

Cold does more damage to camp kitchens than mud, grease, and campfire smoke combined — and it does it quietly, while the box sits in your garage. A cup of water left in the tank, a butane canister that won't light, a faucet battery that never holds a charge again: all three are preventable in about twenty minutes. Here's the cold-weather routine that keeps an all-in-one camp kitchen alive through winter, whether you're storing it until spring or cooking straight through the season.
Why Cold Is Harder on a Camp Kitchen Than Rain or Dirt
Three things inside a modern camp kitchen box genuinely dislike freezing temperatures, and none of them are the stainless steel.
- Trapped water. Water expands roughly 9 percent by volume when it freezes, according to the U.S. Geological Survey. That expansion is what splits garden hoses and cracks engine blocks — and it will do the same to a plastic water tank, a pump housing, or the short run of tubing behind a camp kitchen faucet. The water doesn't need to be visible to cause damage; a few ounces pooled in a low spot of the line is enough.
- Plastic components. Polymers stiffen as temperatures drop and lose impact resistance, which is why plastic parts that shrug off abuse all summer can crack from a minor knock in January. Latches, hinges, drawer slides, and tank fittings are the usual casualties — not because the cold breaks them directly, but because cold-stiffened plastic breaks when you force it.
- The lithium battery in the faucet. If your camp kitchen has a USB-rechargeable faucet or water pump, it has a small lithium-ion battery, and lithium chemistry has a hard rule: charging below freezing causes lithium plating on the anode, which permanently reduces capacity. Cold storage mostly just saps performance temporarily; cold charging does lasting damage.

The good news: every one of these failure modes has a cheap, boring fix. The fixes are the rest of this article.
Step One: Get Every Drop of Water Out
Draining the water system is the single most important cold-weather task — everything else on this list is optional by comparison. If your camp kitchen will sit anywhere that drops below 32°F, even for one night, the tank, pump, and faucet line need to be empty. Here's the full sequence:
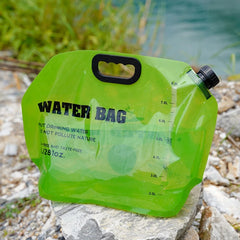
- Empty the tank completely. Pour it out, then tip the box so the last of the water finds the drain or fill opening. A tank that looks empty can still hold a surprising amount in its corners.
- Run the faucet until the pump sputters. The pump and its tubing hold water even after the tank is dry. Run the faucet until it spits air, then hold it open a few seconds longer.
- Leave everything open. Store the kitchen with the tank cap off and the faucet open. Sealed systems trap humid air that condenses, pools, and freezes; open systems dry out.
- Drain the sink and its hose. Sink basins drain fine on their own, but a graywater hose with a low loop in it will hold water all winter. Disconnect it, hang it straight until it stops dripping, then coil it loosely.
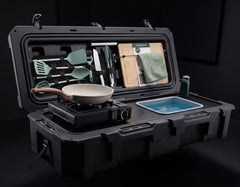
On a VOZ Camp Kitchen, this whole routine takes about ten minutes, because the tank and USB faucet lift out of the case — you can drain, dry, and store them separately instead of chasing water around a built-in system.


One caveat: if you physically can't get the last water out of a pump line and the kitchen must be stored somewhere that freezes, RV antifreeze (the pink propylene-glycol type sold for potable water systems) is the standard fallback — a small amount displaces the trapped water. Flush the system thoroughly before the first use in spring. But for a portable camp kitchen, full draining is almost always achievable and always better.
Step Two: Protect the Faucet Battery Like It's Your Phone
A USB-rechargeable faucet is one of the best features on a modern camp kitchen — and its battery is the most cold-sensitive part of the whole setup. Three rules keep it healthy:
- Never charge it below freezing. Bring the faucet or pump indoors and let it warm to room temperature before plugging it in. Charging a lithium battery below 32°F causes permanent capacity loss even when nothing looks wrong.
- Store it indoors, at about half charge. Battery manufacturers recommend storing lithium cells at roughly 40–50 percent charge rather than full or empty. Charge it halfway in November, top it off before your first spring trip, and it will behave like new.
- Don't leave it in the box in the garage. An unheated garage in the northern half of the US spends weeks below freezing. The stainless case doesn't care; the battery does. The faucet weighs a few ounces — it can live in a kitchen drawer all winter.
The same rules apply to any electric water gear you camp with — dispenser pumps, rechargeable suction pumps, and battery lanterns all use similar cells.


Step Three: Match Your Fuel to the Temperature
If you cook outdoors in winter rather than just storing gear through it, fuel choice decides whether dinner happens. The physics are simple: canister fuel has to vaporize to burn, and each fuel stops vaporizing at a different temperature.
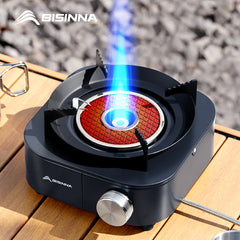
- Butane stops vaporizing right around 31°F. At freezing, a butane cassette stove produces a weak, sputtering flame or nothing at all — the canister can be full and still useless.
- Propane keeps vaporizing down to about -44°F, which is why it's the default winter fuel for car campers. A propane two-burner behaves in January almost exactly the way it behaves in July.
- Isobutane blends split the difference and keep working well below freezing, which is why backpacking canisters are usually an isobutane-propane mix rather than pure butane.

Two field habits make any of these fuels work better in the cold. First, keep spare canisters warm — in the vehicle cab or inside your jacket for a few minutes before cooking — because a warm canister maintains pressure longer than a cold one. Second, block the wind. The National Park Service's winter-readiness guidance also recommends testing your stove before the trip and packing insulated containers so food and water don't freeze between meals. If your current stove is butane-only, a propane model is the one upgrade that makes winter cooking genuinely reliable — our camp stove lineup includes propane two-burners built for exactly this.


Step Four: The Twenty-Minute Winterizing Checklist
Before the camp kitchen goes into storage for the season, run through this once:
- Drain the tank, pump, faucet line, and sink hose; leave caps off and the faucet open.
- Wash and fully dry every item in the kit — cookware, utensils, cutting boards — before it goes back in the case. Trapped moisture in a closed box is how mold and rust start. If you're not sure what should be in there, the full rundown of what's included in a camp kitchen kit doubles as a repacking checklist.
- Pull the faucet battery (or the whole faucet) and store it indoors at half charge.
- Wipe stainless surfaces dry, and leave latches closed but not compressed so gaskets don't take a set over the winter.
- Store fuel canisters upright in a dry, ventilated spot away from living spaces — never inside the sealed kitchen box, where temperature swings cause condensation on the steel.
- Crack the lid or leave a moisture absorber inside if the box lives anywhere humid.
Do this in November and your spring setup is: fill tank, charge faucet, cook.
FAQ
Can I leave water in the tank if it only freezes overnight?
No. One hard overnight freeze is enough — water expands about 9 percent when it turns to ice, and it exerts that pressure against whatever contains it. A cracked tank or split pump housing usually traces back to a single cold night, not a long deep freeze.
Will freezing temperatures hurt the stainless steel parts?
Not meaningfully. Stainless steel handles winter fine; the vulnerable parts are plastic fittings, rubber gaskets, tubing, and the battery. Cold-related damage to a camp kitchen is almost always a water-expansion or battery problem wearing a metal box as a disguise.
Can I actually use my camp kitchen for winter camping, not just store it?
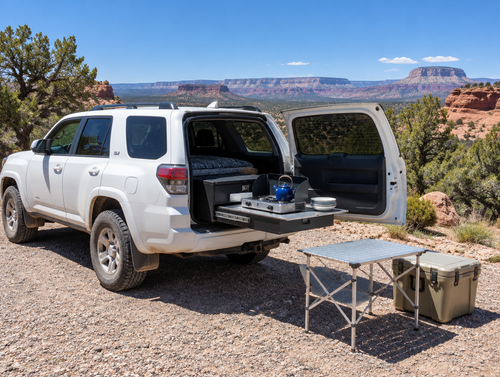
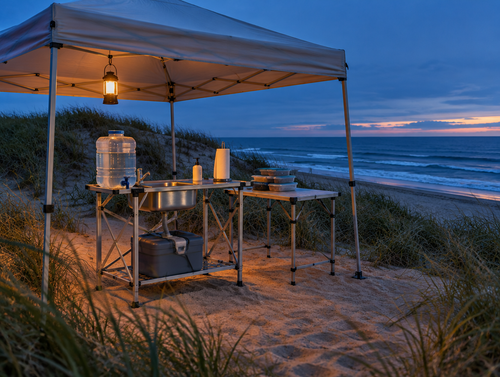
Absolutely — winter is where an enclosed, weatherproof kitchen box earns its keep, since your gear stays dry and organized in conditions that destroy open-table setups. The adjustments are the ones above: run propane, keep the faucet battery warm (an inside jacket pocket works between uses), and drain the water system at the end of each cooking session instead of once at the end of the trip.
What if I can't get the last bit of water out of the pump?
Either store the pump somewhere heated — it's small enough to bring inside — or run a splash of potable-system RV antifreeze through the line and flush it in spring. What you shouldn't do is guess. If you can't confirm the line is dry, treat it as wet.
- Camp Kitchen Kit: Everything That's Included (and Why It Matters)
- Camp Kitchen With Sink: Why Running Water Changes Everything Outdoors
- Portable Camp Kitchen: Why Size and Weight Matter More Than You Think
- How to Store a Camp Kitchen Between Trips (So It's Ready Next Time)
- How to Keep a Camp Kitchen From Rusting: Weatherproofing That Actually Works
Ready to upgrade your camp kitchen?
The VOZ Camp Kitchen includes everything you need in one weatherproof case. Sets up in 15 seconds.
Shop VOZ Camp Kitchen →