How to Wash Dishes With a Camp Kitchen Sink: The 3-Bin Method Made Easy

Washing dishes is the camp chore nobody volunteers for — mostly because most groups improvise it fresh every single trip. The 3-bin method (wash, rinse, sanitize) ends the improvising: it's the same simple assembly line every time, it scales from two plates to twenty, and with a camp kitchen sink handling the plumbing, the whole session wraps up in minutes.
Why the 3-Bin Method Beats Winging It
The 3-bin method — you'll also hear it called the three-pot or three-bucket method — has been standard practice in scout camps and river outfits for decades, and it has survived because it solves the three separate problems every camp dishwashing session has: food residue, soap residue, and the bacteria you can't see. Each bin handles exactly one of them:
- Bin 1 — Wash. Hot, soapy water. All the scrubbing happens here, and only here.
- Bin 2 — Rinse. Clean, hot water. This strips off the soap film so tomorrow's coffee doesn't taste like detergent.
- Bin 3 — Sanitize. Clean water with a measured dose of unscented bleach (or a sanitizing tablet). This kills what the sponge can't.
The order matters as much as the bins do. Wash water gets dirty fast, rinse water stays cleaner, and the sanitizing solution stays cleanest — so dishes always move from dirtiest water toward cleanest water, never backward. The CDC recommends this exact wash–rinse–sanitize–air-dry sequence for cleaning dishes and food-contact items safely.
What You Need Before the First Dirty Plate
The full kit packs into a single tote:
- Three basins — three collapsible tubs, or a built-in camp kitchen sink plus two tubs
- Biodegradable dish soap (a few drops per session is genuinely enough)
- A plastic scraper or a retired spatula for pre-scraping plates
- A sponge or dish brush that lives with the dish kit and does nothing else
- Regular, unscented household bleach in a small leakproof bottle — or sanitizing tablets
- A fine-mesh strainer for the graywater
- A quick-dry towel, or better, a mesh bag so everything can air-dry
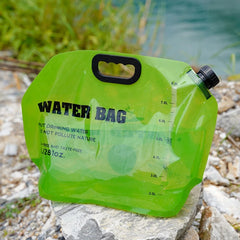
- Water you can dispense hands-free — a jug or tank with a tap from our camp water gear lineup beats hauling open pots from the spigot


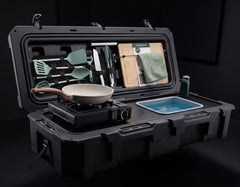
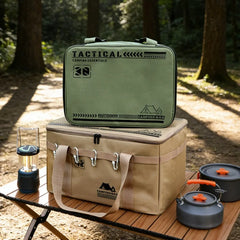
If you'd rather not assemble and repack that kit trip after trip, this is exactly the problem the VOZ Camp Kitchen was built to solve: the box carries a built-in sink, a USB-rechargeable faucet, a water tank, and 30+ cooking and cleanup items in one weatherproof case — so the dish station is packed whenever the box is.


The 3-Bin Method, Step by Step
- Scrape first. Before anything touches water, scrape every plate and pan into the trash. Every bit of food that stays out of Bin 1 keeps the wash water usable longer — and food scraps in graywater are exactly what attracts animals to camp.
- Heat the water. While dinner winds down, set a pot on the stove. Warm-to-hot water for the wash bin, hot water for the rinse. The sanitize bin can stay cool — the bleach does that job, not the temperature.
- Wash. A few drops of biodegradable soap in Bin 1 — resist the urge to pour more; it only makes the rinse harder. Work from cleanest to dirtiest: cups and utensils first, plates next, greasy pots dead last.
- Rinse. Dunk and swish each item in Bin 2 until it no longer feels slippery. If you have a faucet, rinse under running water instead — it stays clean for the whole session.
- Sanitize. Mix the CDC's recommended solution: 1 tablespoon of regular, unscented household bleach (the standard 5–9% sodium hypochlorite kind) per 1 gallon of clean water. Give each item a slow dunk so the solution reaches every surface.
- Air-dry. Don't towel the sanitizer off — set everything in a mesh bag or on a clean surface and let it dry. The CDC's guidance is to air-dry after sanitizing; the residue breaks down on its own.

How a Built-In Sink Collapses the Whole Routine
Here's the honest part the classic guides skip: the annoying half of the 3-bin method was never the washing. It's the setup — finding a level surface, unpacking three tubs, hauling water in something never meant to pour, then juggling a bin of graywater at the end. A camp kitchen box with a built-in sink deletes most of that. The sink is already mounted at working height the moment the box unfolds — the same one-motion open covered in our guide to setting up a camp kitchen in under 15 seconds — and the USB-rechargeable faucet pulls straight from the onboard water tank.
The faucet changes the rinse step more than anything else. Instead of dunking soapy dishes into standing rinse water that turns cloudier with every plate, you hold each item under a stream of clean running water. In practice, the box becomes Bin 2 — the rinse station — while two collapsible tubs on the lid or a side table handle wash and sanitize duty. The graywater collects in the sink basin, ready to be strained and carried off in one pour. If your current setup has no sink at all, a standalone folding camp sink with an electric pump gets you the same running-water rinse for a lot less than rebuilding your whole kit.


Dump the Water the Right Way
A clean dish session can still end badly if the graywater goes in the wrong place. The National Park Service's Leave No Trace guidance is specific: carry wash water at least 200 feet away from streams or lakes, use small amounts of biodegradable soap, and scatter the strained dishwater over a wide area. Two hundred feet is roughly 70 big steps — count them once and you'll have the distance calibrated for good.
Strain first, always: pour the water through your mesh strainer, and pack the caught food scraps out with the trash. In a developed campground, skip the scattering entirely and use the utility sink or designated graywater drain if one exists — never the bathroom sink or the bushes behind your site. We covered every disposal scenario, from dispersed sites to RV dump stations, in our guide to where to dump camp kitchen graywater.

FAQ
How much bleach do I actually need to carry?
Very little. The CDC ratio is 1 tablespoon per gallon of clean water, and a typical sanitize bin holds a gallon or less. A small leakproof travel bottle of regular, unscented household bleach covers trip after trip. Never substitute scented, concentrated, or gel bleach — the CDC guidance is specific to the regular unscented kind.
Can I skip the sanitizing bin?
On a solo overnight where you're the only one eating off your plate, plenty of campers do. The math changes with a group: shared serving spoons, kids' hands, and raw-meat prep all raise the stakes, and the third bin adds barely any time to the session. If carrying bleach bothers you, a dunk in boiling water or a sanitizing tablet does the same job.
Does the rinse water really need to be hot?
Hot water cuts grease faster and helps dishes dry quicker, so it earns its place in the wash and rinse bins. The sanitize bin is the exception — the bleach does the disinfecting work, so cool water is fine there.
How do I keep the sink and water tank from getting funky between trips?
Drain everything, run the faucet dry, and let the tank and basin air out completely before the box goes back in the garage. A sink that gets packed wet grows mold in storage — we wrote a full walkthrough on cleaning the camp kitchen sink and water system so it never gets that far.
Ready to upgrade your camp kitchen?
The VOZ Camp Kitchen includes everything you need in one weatherproof case. Sets up in 15 seconds.
Shop VOZ Camp Kitchen →