Clever Camp Kitchen Setup Ideas: 9 Real Layouts That Make Campsite Cooking Easier

Most campsite cooking frustration has nothing to do with the food. It comes from the layout: the stove is downwind of nothing, the cooler blocks the prep space, and everyone ends up walking through the cook zone. Here are nine real camp kitchen layouts, from solo tailgates to family picnic-table setups, that you can copy at your next site.
Start With One Rule: Box First, Everything Else Around It
Every layout below starts by placing the kitchen box, then fitting the cooler, a side table and the wash area around it. If you put the box down first, the rest falls into place in a few minutes instead of turning into a 20-minute shuffle. Our step-by-step setup guide covers opening and deploying the box itself. This article is about where it goes and what goes next to it.
A few things apply to every layout:
- Stove outside, always. The US Consumer Product Safety Commission warns that people die every year from carbon monoxide after running camping stoves inside tents, campers and vehicles. Every layout here keeps the burner in open air.
- Traffic stays out of the hot zone. Put the stove on the end of the line that nobody needs to walk past.
- Water goes next to wash, not next to cook. Drips and splashes stay away from the burner.
If you want the reasoning behind the cook, prep and wash order, our cook, prep and wash zones guide goes deep on workflow. The layouts below are the quick inspiration version: pick one that matches your trip and copy it.
Small-Crew Layouts: Solo, Couples and Compact Cars
1. The Solo Tailgate Strip
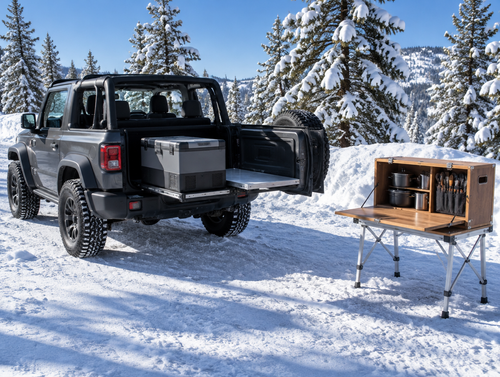
Put the box on the tailgate or the edge of the cargo floor and open it out sideways. The burner goes on the end farthest from the vehicle, the sink faces you, and a small cooler sits on the ground right under your hand. Everything is within one step. This works well for a single cook making simple meals, and it packs away in the time it takes the pan to cool.
2. The Couple's L-Shape
Set the box in a straight line and add a side table at a right angle to the stove end. One person cooks at the box, the other preps on the side table, and nobody bumps elbows. An adjustable-height side table lets you match the prep surface to the box. Standard home counters are about 36 inches high, which is a good target if you cook standing up.

3. The Hatchback Overhang
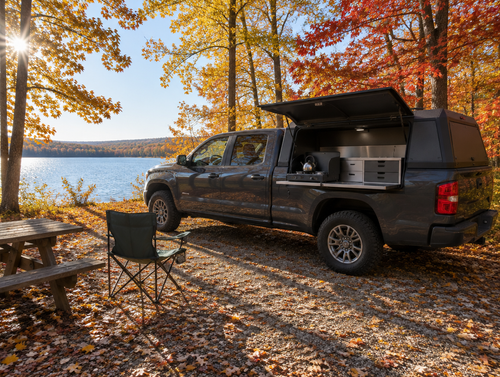
In an SUV or crossover, the open liftgate is your awning. Park so the box sits just behind the bumper with the burner on the downwind side, outside the overhang so heat and fumes don't collect under the hatch. The cargo area becomes your pantry shelf. This is the go-to layout for overlanders who park, cook and move on.
Family and Group Layouts
4. The Picnic-Table U
Campground picnic tables are perfect for this one. Put the box at one end of the table, the cooler at the other end on the ground, and use the tabletop between them as the prep and serving counter. Kids sit on the far bench, away from the stove end. The "U" is the box, the table and the cooler, and the cook works inside it.
5. The Two-Station Group Line
Groups of six or more do better with two cooking stations than with one crowded box. Run the kitchen box as the main station for sides, sauces and coffee water, and set a second burner or a charcoal grill on its own table a few steps down the line. A roll-up table that seats four to six becomes the serving and eating area at the end. Everyone grabs food from the table, not from the cook.


Where the cooler goes matters more in a group layout than anywhere else, because it gets opened constantly. Our guide to cooler placement and pairing shows the best spots so the cooler stays reachable without blocking the cook.
6. The Base-Camp Horseshoe
For multi-night trips, arrange the box, a full-size table and the wash station in a horseshoe that opens away from the tents. Add a canopy or tarp over the whole thing and you have an outdoor kitchen that handles breakfast through dinner for a week. Keep fuel canisters stored at the closed end, away from foot traffic.

Special-Situation Layouts
7. The Tailgate Party Line
For game days, run everything in one straight line along the side of the vehicle: stove on the downwind end, prep in the middle, cooler and serving table on the end closest to the crowd. Guests serve themselves from the far end and never walk past the burner. A side grill at the stove end handles burgers while the box burner does everything else.


8. The Bear-Country Split Camp
In bear country, the kitchen and the tents are two separate camps. The US Forest Service and the National Park Service both advise cooking and eating at least 100 yards from where you sleep. So the box, cooler and wash area stay together in one cluster, the tents go far up the site, and nothing that smells like food goes back to the sleeping area. Read our bear-safe camp kitchen layout for the full setup.
9. The Waterside Wash Layout
Lakeside and riverside camps are tempting places to wash dishes right at the shore. Don't. Leave No Trace guidance is to carry wash water at least 200 feet from lakes and streams, strain out food scraps and scatter the strained water. Keep the box and sink back from the water, and if you're cleaning fish, use a dedicated station so fish waste stays away from the dishes and cookware. Our graywater disposal guide covers where the water goes.


Which Layout Fits Your Trip?
| Layout | Best for | Extra gear beyond the box |
|---|---|---|
| Solo Tailgate Strip | One cook, quick meals | Small cooler |
| Couple's L-Shape | Two cooks | Side table |
| Hatchback Overhang | SUVs, overlanding | None |
| Picnic-Table U | Families at campgrounds | Cooler |
| Two-Station Group Line | Six or more people | Second burner or grill, large table |
| Base-Camp Horseshoe | Week-long trips | Table, canopy or tarp |
| Tailgate Party Line | Game days, crowds | Grill, serving table |
| Bear-Country Split Camp | Bear habitat | Bear-resistant storage |
| Waterside Wash Layout | Lakes, rivers, fishing trips | Fish cleaning station (optional) |
Why an All-in-One Box Makes Every Layout Easier
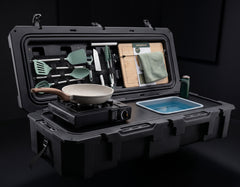
All of these layouts get easier when the cook, prep and wash zones come in a single unit. With a folding table and loose bins, you have to set up all three zones from scratch every time. The VOZ Camp Kitchen opens with the butane stove, cutting board and collapsible sink already in place, plus a USB-rechargeable faucet fed from a removable 2-gallon tank. Since your base station is set the moment the lid opens, choosing a layout is just a matter of deciding what goes beside it. Closed, it measures 47.6 x 19.3 x 11.4 inches and weighs about 57 pounds loaded, so it fits on a tailgate, a picnic table or the ground.


FAQ
What is the best camp kitchen layout for a family?
The Picnic-Table U works best at most campgrounds. Put the box on one end, the cooler on the other, use the tabletop in between for prep, and seat kids on the far bench away from the stove.
How far should the camp kitchen be from the tent?
In bear country, federal land agencies advise cooking and eating at least 100 yards from where you sleep. Anywhere else, keep the stove well clear of tent walls and never cook inside the tent because of carbon monoxide.
Where should the stove go in a camp kitchen setup?
Put it on the end of the line nobody needs to walk past, ideally downwind of the prep and eating area, and in open air, not under a hatch or tarp where fumes can collect.
Do I need a separate table with a camp kitchen box?
Not for solo or hatchback setups. For two cooks or a group, a side table or a full-size table gives you a second prep area and somewhere to serve food.
Ready to upgrade your camp kitchen?
The VOZ Camp Kitchen includes everything you need in one weatherproof case. Sets up in 15 seconds.
Shop VOZ Camp Kitchen →