DIY Plywood Chuck Box vs. Buying a Camp Kitchen: Real Cost and Time

Price out a finished portable camp kitchen and wince, and the internet has a tempting answer waiting: build your own plywood chuck box for "around $50." It is a real project with real plans behind it. But that $50 headline number leaves a lot out. Here is the honest cost-and-time math for a DIY plywood chuck box, laid side by side with simply buying a kitchen that is ready to cook on.
What a DIY plywood chuck box actually is
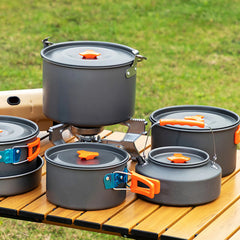
A chuck box is a wooden box that holds your stove, cookware, and food, usually with a lid or door that folds down into a prep surface. It is the modern descendant of the cowboy chuck wagon, and it is a genuinely satisfying weekend project for anyone who likes working with wood. The most-shared build guide, published by REI, walks you through making one from a single 4-foot by 8-foot sheet of half-inch plywood plus hinges, latches, magnet closures, wood glue, and screws. REI even offers a downloadable cut sheet so you do not have to plan the layout yourself. If you want the full picture of how a wooden chuck box stacks up against a modern molded kitchen, we cover the broader category in our camp kitchen vs. chuck box guide.
The key thing to understand before you price anything: a chuck box is just the box. It is a smart storage and prep shell. It does not come with a stove, a sink, a faucet, or a water tank — you supply all of that yourself.
The real materials cost
That "around $50" figure is achievable, but only if you use basic sheathing-grade plywood, minimal hardware, and skip a proper finish. Build something you will actually want to keep in your truck for ten years, and the bill climbs. Here is a realistic materials breakdown using current US home-center pricing.
| Material | Typical cost |
|---|---|
| One 4x8 sheet, 1/2" plywood | $30 – $55 (cabinet-grade birch can exceed $90) |
| Hinges (several sets) | $15 – $25 |
| Latches and magnet closures | $12 – $25 |
| Wood glue and screws | $15 – $25 |
| Primer + exterior paint or sealer | $20 – $35 |
| Carry handles | $10 – $20 |
| Realistic sturdy build | $100 – $185 |
So the true range is roughly $50 for a bare-bones box up to about $185 for a sturdy, finished one. Builders who add solid-wood frames or drawers commonly land between $100 and $150 in materials alone. None of that includes the stove or the water gear you still need to buy.

The hidden line items build guides skip
The materials list is the part everyone publishes. The costs below are the ones that quietly blow up the budget for a first-timer.
- Tools. If you do not already own a circular saw or table saw, a drill, clamps, and a sander, that is easily $150 to $400-plus. Most hardware stores will rip a sheet of plywood for you when you buy it, but they only do straight cuts and usually limit how many.
- Weatherproofing. Bare plywood swells, warps, and delaminates the first time it gets rained on. Doing it right means primer plus two or three coats of exterior sealer or marine-grade finish — more money and a lot of drying time.
- Mistakes. First builds rarely go perfectly. A miscut panel or a split edge means another trip to the store and more material.
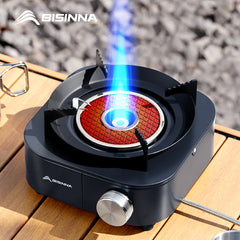
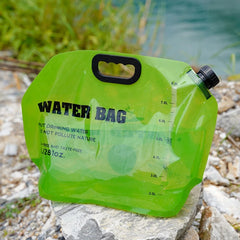
- Everything that cooks. Remember, the box is empty. You still need a camp stove, a water container, and a faucet or pump to have a working kitchen.
That last point is the big one. A finished plywood box still needs a burner before you can boil water. A reliable two-burner or single-burner camp stove is its own purchase, and good ones are worth budgeting for.


How long it actually takes
Time is the cost nobody puts on the spreadsheet. A chuck box is not a one-evening build. Realistically you are looking at a full weekend at minimum, and most build logs online span three to four days of part-time work. Here is why it stretches out:
- Measuring and laying out cuts on the sheet (measure your stove with the fuel attached first — that sets the box dimensions)
- Cutting all the panels accurately
- Gluing and screwing the carcass, then letting the glue cure overnight
- Sanding, then two or three finish coats with dry time between each
- Mounting hinges, latches, and handles, and fitting your gear
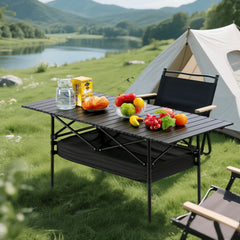
Even a confident woodworker is realistically spending 8 to 15 hands-on hours, plus overnight cure and finish-drying time on top. Compare that to a manufactured kitchen, which ships ready to use — the only "build time" is unfolding it at the campsite. We timed that process in our guide to setting up a camp kitchen in seconds.

Where a bought camp kitchen pulls ahead
Once you add up materials, tools, finish, the stove, the water gear, and a weekend of labor, the gap between DIY and buying narrows fast — and a finished kitchen brings things a plywood box simply cannot.
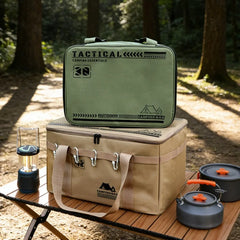
The VOZ Camp Kitchen is built around exactly the parts a chuck box leaves out: an integrated stove, a real sink with a USB-rechargeable faucet, a water tank, and more than 30 camping items, all inside a weatherproof case. There is no glue to cure, no finish to dry, and nothing to seal against rain — the case is already weatherproof out of the box. Plumbing running water into a homemade plywood box is the kind of project most DIYers never attempt.


Weight is the other quiet advantage. A single sheet of half-inch plywood weighs around 50 pounds on its own, and finished wooden chuck boxes commonly come in near 32 pounds empty and over 50 pounds fully loaded. Wood is heavy, and it is hard to build light without sacrificing strength. If you want to see how a molded kitchen compares against specific name-brand units, our VOZ vs. GCI Outdoor comparison and our VOZ vs. Trail Kitchens comparison break the trade-offs down feature by feature.
When DIY still makes sense
None of this is a knock on building your own — there are real reasons to do it:
- You already own the tools and enjoy woodworking as a hobby
- You need a very specific size to slot into an exact spot in your vehicle
- You value the project itself as much as the result
- You are happy supplying and arranging your own stove and water gear
What DIY is usually not is the guaranteed money-saver the $50 headline implies. Once tools, finish, the stove, and a weekend of your time are on the table, buying a finished, weatherproof, water-equipped kitchen is often the cheaper and faster path — especially if you only build one box and never touch the saw again.
FAQ
Is a DIY chuck box really cheaper than buying?
Sometimes, but less often than people expect. The bare materials can be close to $50, but a sturdy finished box runs $100 to $185, and that is before the stove, water gear, tools, and your labor. Add those and the savings often disappear.
How heavy is a plywood chuck box?
Heavier than most expect. A half-inch plywood sheet alone weighs roughly 50 pounds, and finished boxes commonly sit near 32 pounds empty and over 50 pounds loaded with gear.
Do I need power tools to build one?
Practically, yes — a saw, a drill, and clamps at minimum. Many hardware stores will make straight cuts in your plywood at purchase, which helps if you lack a saw, but you will still need a drill to assemble and mount hardware.
Will bare plywood survive getting rained on?
No. Untreated plywood swells and delaminates when it gets wet. A DIY box needs primer and several coats of exterior or marine-grade sealer to hold up outdoors, which adds cost and drying time. A weatherproof molded case skips that problem entirely.
How long does a build take?
Plan on a full weekend at minimum. Between cutting, assembly, overnight glue cure, and multiple finish coats with dry time, most builders spread the work across three to four days.
Ready to upgrade your camp kitchen?
The VOZ Camp Kitchen includes everything you need in one weatherproof case. Sets up in 15 seconds.
Shop VOZ Camp Kitchen →