

How to Fix a Leaking Camp Kitchen Water Tank: Patch, Seal, or Replace

The water system is what separates a real camp kitchen from a plain chuck box — and a leaking tank takes that system offline fast, soaking your gear box on the drive and draining your dish water before dinner. The good news: most "tank leaks" aren't cracked tanks at all, and even a genuine crack usually has a fix that's far cheaper than retiring the kitchen.
Find the Leak First — It's Rarely Where the Water Shows Up
Water is sneaky. It runs along the tank wall, follows a seam or a hose, and drips off somewhere far from the actual hole — so the wet spot at the bottom of your kitchen case tells you almost nothing. Before you buy a single repair product, run a proper leak test at home:
- Empty and dry the tank completely, inside and out, and set it on dry cardboard or newspaper in the garage.
- Fill it to normal capacity with tap water and add a few drops of food coloring — dyed water makes even a slow weep obvious.
- Wrap dry paper towel around every fitting: the cap, the spigot or pump line port, and any drain plug. A damp or tinted towel pinpoints the culprit.
- Wait 12–24 hours. Slow leaks that only show up on a full weekend tank won't reveal themselves in ten minutes.
Check the simple stuff first. In most portable tanks there are only three places water can escape: the cap or lid seal, a fitting where a hose or spigot passes through the wall, and the tank wall itself. The first two are ten-minute fixes; only the third calls for a patch kit.

The Ten-Minute Fix: Fittings, Gaskets, and O-Rings
If the paper-towel test points at a fitting, don't reach for glue — reach for a wrench, gently. Unscrew the fitting or locknut, pull the rubber gasket or O-ring, and look at it in good light. A flattened, cracked, or gritted-up seal is the whole problem. Wipe the sealing surfaces clean, seat a new O-ring (a smear of food-grade silicone grease helps it seat without twisting), and reassemble.
The counterintuitive part: tighten by hand, not with tools. Poly tank manufacturers warn that overtightening a fitting is what damages the gasket — and can even crack the tank wall around the fitting, turning a drip into a real repair. Snug it hand-tight, fill the tank to fitting level, and watch for seepage before you call it done.
Cap leaks work the same way: most caps seal against a flat gasket that dries out, shrinks, or falls out unnoticed in the dish bin. Replacement gaskets are commodity parts, and this is the same five-dollar-part logic that applies to latches, hinges, and pump repairs — the hardware that moves fails long before the tank around it.

Patching a Cracked Tank: Tape and Epoxy Have Real Limits
Here's the hard truth about actual wall cracks: nearly every portable water tank is polyethylene, and polyethylene is famously glue-proof. It has what materials engineers call a low-energy surface — water beads up on it, paint beads up on it, and most adhesives never truly grip it. That's why the epoxy that fixed your canoe paddle peels off a water tank in a month.
That doesn't make patching pointless — it makes prep and product choice everything:
- Drain and dry the tank completely. Nothing bonds to a damp surface.
- Drill a small stop hole at each end of a crack so it can't keep spreading under the flexing of a full tank.
- Rough up the area with coarse (about 60-grit) sandpaper an inch or two beyond the crack in every direction — mechanical grip is doing most of the work on polyethylene.
- Size the patch generously. Fiberglass-and-epoxy patch instructions call for cutting the patch 1–2 inches larger than the crack on all sides, and letting it cure a full 24 hours before refilling.
Know the ceiling on this approach: plastic-tank repair suppliers say DIY patch kits work best on cracks up to about 5 inches and holes up to about 1 inch. A longer split, a crack through a molded corner, or a leak at a factory seam is structural — patches on those fail early and often.
Sealant tape is the other popular route, and it earns its reputation with caveats. EternaBond-style repair tape is rated by its maker for a 18–35 year service life and carries a 10-year warranty, but that record comes from roof work — flat, dry, non-pressurized surfaces. On a tank bottom that flexes under a full load of water, RV owners report mixed lifespans: some repairs hold for years, others let go in months. Treat tape as a trip-saver, not a permanent fix.
One rule is non-negotiable for a drinking-water tank: patch from the outside, and if a product will ever touch the water itself, use only sealants rated for potable or food contact — look for NSF/ANSI markings or FDA food-contact compliance on the label. Certified marine sealants for potable tanks exist, but budget time: one widely recommended NSF-listed polyurethane needs around five days to fully cure. Generic hardware-store epoxy and silicone carry no such rating.
Plastic Welding: The Only Truly Permanent Polyethylene Repair
Because glue can't grip polyethylene, the one repair that behaves like the original tank is a plastic weld — melting matching filler rod into the crack with a hot-air tool so the patch and the tank become a single piece of plastic. In bench testing by a marine gear publication, a welded repair reinforced with stainless mesh held more than 150 pounds of force before breaking — far beyond anything an adhesive patch managed on the same plastic.
The catch is skill and wall thickness. Thin-walled jerry-can-style tanks are easy to burn through, and a bad weld makes the hole bigger. Budget hot-air welding kits cost less than most tank replacements, but if you've never welded plastic, practice on a milk crate first — or hand the job to an RV or plastics repair shop, many of which weld tanks routinely. For a thick-walled tank with a long crack, a professional weld is the repair most worth paying for.
Repair or Replace? The Honest Decision Table
Sometimes the right fix is a new tank. Portable tanks are standard, inexpensive components — unlike an RV's molded underbody tank, you're not tearing out cabinetry to swap one.
| What you found | Best fix | Downtime |
|---|---|---|
| Weeping fitting or cap | Clean, re-seat, or replace the gasket / O-ring; hand-tighten | 10 minutes |
| Hairline crack under ~5", mid-panel | Exterior epoxy or sealant-tape patch after sanding and stop-drilling | 24 hours' cure (up to ~5 days for NSF-rated sealant) |
| Long or spreading crack, thick wall | Plastic weld (DIY hot-air kit or RV shop) | A day, plus practice |
| Crack at a seam or molded corner | Replace — structural cracks re-open | Until the new tank arrives |
| Chalky, brittle, UV-faded plastic with multiple cracks | Replace — the material itself is done | Until the new tank arrives |
| Seam or fitting leak on a nearly new tank | Warranty claim — contact the seller before you modify anything | Varies |
That last row matters more than people think. A seam or fitting-boss leak on a young tank is a manufacturing defect, and a DIY patch job can complicate or void the claim. Photograph the leak, then email support first.
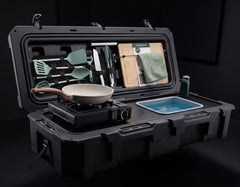
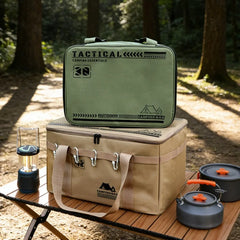
In an integrated kit like the VOZ Camp Kitchen, the water tank is a removable component sized to its slot in the case rather than a molded-in part — so a damaged tank means replacing one piece, not the kitchen. If you're mid-repair and a trip is coming, a standalone water container with a spigot keeps the wash station running in the meantime, and when sizing a replacement it's worth rereading the gallons-per-day math before defaulting to the same capacity.


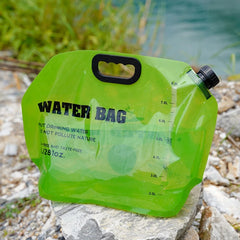
Standalone jugs, collapsible bags, and containers with built-in faucets all cover the same role while your main tank is out of service.


Sanitize Before You Drink From It Again
Any repair session — hands inside the tank, sanding dust, a tank that sat open and empty for days — calls for a sanitizing pass before the tank goes back to potable duty. The CDC's method for water storage containers is simple: mix 1 teaspoon of unscented household bleach (5–9% sodium hypochlorite) into 1 quart of water, cap the tank, and slosh so the solution touches every interior surface. Wait at least 30 seconds, pour it out, and let the tank air-dry completely. The full procedure is on the CDC's emergency water supply page. Let any patch cure fully before sanitizing — bleach solution on uncured sealant helps nobody. This is also the moment a full water-system deep clean pays off, since a tank that's been leaking has usually been sitting damp.
A complete camp kitchen bundles the tank with the pump, faucet, and sink it feeds — here's everything that's included in a full kit — so when you sanitize the repaired tank, run a batch of the solution through the faucet line too. A clean tank feeding a musty pump line defeats the purpose.
FAQ
Can I use hardware-store epoxy on a drinking-water tank?
On the outside surface, yes — epoxy putty over a sanded exterior crack never contacts your water. Inside the tank, no: use only products with an NSF/ANSI listing or FDA food-contact compliance printed on the label. Generic epoxy and silicone aren't tested for continuous drinking-water contact.
Why won't regular silicone caulk fix my tank?
Two reasons: polyethylene's low-energy surface means silicone peels off once the tank flexes, and bathroom caulk isn't rated for potable water. It can smear over a leak long enough to finish a weekend, but expect it to let go.
How long after patching can I use the tank?
Follow the product's full cure time, not its dry-to-touch time. Typical fiberglass-epoxy patch instructions say 24 hours before refilling; some NSF-rated potable sealants need around five days. Then sanitize, then fill.
Is a leaking tank a warranty issue?
If the tank is relatively new and leaks at a factory seam or a molded fitting boss — rather than at a crack from an obvious drop or freeze — treat it as a defect. Photograph it and contact the seller before attempting any repair, since modifications can void a claim.
- Camp Kitchen Kit: Everything That's Included (and Why It Matters)
- How Big Should a Camp Kitchen Water Tank Be? The Gallons-Per-Day Math
- How to Clean a Camp Kitchen Sink and Water System (and Prevent Mold)
- Camp Kitchen Repairs You Can Do Yourself: Latches, Hinges, Legs, and Pumps
- How Long Does a Camp Kitchen Last? Lifespan and What Wears Out First
Ready to upgrade your camp kitchen?
The VOZ Camp Kitchen includes everything you need in one weatherproof case. Sets up in 15 seconds.
Shop VOZ Camp Kitchen →