How to Light Your Camp Kitchen for Cooking After Dark

Dinner at camp has a way of sliding past sunset — the hike ran long, the fire took a while, and now you're dicing onions by the glow of a phone flashlight wedged under your chin. Good camp kitchen lighting isn't about flooding the whole site; it's about putting the right amount of the right color light exactly where your knife, stove, and sink are.
Cooking Light Is Task Light, Not Mood Light
Most campsite lighting advice treats light as atmosphere. A camp kitchen needs the opposite: task lighting, the same category as the light over a workbench. You're handling sharp knives, judging whether chicken is done, and connecting propane canisters — all jobs where shadows and dim light cause real mistakes.
The overlanding community has settled on some useful working numbers. Task work like cooking calls for roughly 500 to 1,000 lumens aimed at the work surface, while general ambient light around camp only needs 300 to 600 lumens, and reading in the tent takes as little as 100 to 200. That gap matters: a single lantern bright enough for chopping is obnoxious for sitting around, and a lantern dim enough for dinner conversation leaves you guessing at your cutting board. The practical answer is two layers — one brighter light dedicated to the kitchen box, one softer light for everything else — with the kitchen light switched off the moment cooking ends.

Lumens and Color Temperature, Zone by Zone
If you run your camp kitchen with distinct prep, cook, and wash zones, each zone has a slightly different lighting job. Color temperature — measured in kelvin (K) — matters as much as brightness. Warm white sits around 2700–3000K and feels like a campfire's cousin; cooler white around 5000K reads more like daylight and makes fine detail easier to see. The National Park Service notes that 2700K light can still provide excellent color rendition while minimizing unwanted side effects, so you don't need harsh blue-white light to see your food accurately.
| Zone | Target brightness | Color temperature | Why |
|---|---|---|---|
| Prep (lid surface) | 500–1,000 lumens | Neutral to cool (4000–5000K) | Knife work and reading labels demand the most light and detail |
| Cook (stove) | 500–1,000 lumens | Warm to neutral (2700–4000K) | Judging browning and doneness; warmer light is fine if it's bright enough |
| Wash (sink) | 300–600 lumens | Warm (2700–3000K) | You need to see grease, not perform surgery |
| Camp ambient | 300–600 lumens total | Warm (2700–3000K) | Comfortable for eating and conversation, easy on night vision |
The prep zone deserves the most attention because it's where the highest-stakes work happens. If you use your kitchen box the way we describe in our lid prep surface guide — lid open, cutting board on top — the lid itself becomes the surface you're lighting, which conveniently also gives you something to attach a light to.
Where to Put the Light on a Kitchen Box
Placement beats raw power. The standard advice for campsite cook stations is to mount your light slightly behind and above the cooking area, so it throws light down onto the food without casting your own shadow across it. Get the geometry right and a modest lantern outperforms a floodlight pointed at your face.
On an all-in-one kitchen box, you have mounting options a folding table can't match:
- The open lid. A clip-on light or a small lantern with a hook attaches to the raised lid edge, putting light a foot or two above the prep surface — almost exactly the "behind and above" position.
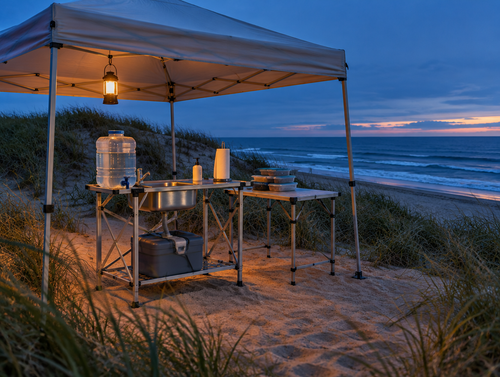
- A telescoping light pole. Freestanding pole lights raise a lantern well above head height over the whole station, lighting prep, stove, and sink at once. Plant it behind your working position, not across from it.
- Magnetic or velcro strip lights. A short LED strip along the inside of the lid washes the work surface evenly with no hot spots. Look for a dimmable one so the same strip covers bright prep work and low-key cleanup.
- A headlamp as the backup layer. A headlamp follows your eyes into the shadowed corners — inside the cooler, under the table — where fixed lights can't reach. Treat it as a supplement, not the main kitchen light; a headlamp-only kitchen blinds everyone you look at.
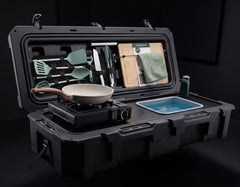
The VOZ Camp Kitchen makes the first option nearly automatic: the weatherproof case's lid opens to standing height, so a single clip light on the lid covers the built-in stove bay and prep area together. Between the stove, sink, tank, and the 30-plus pieces already packed in the case — the full rundown is in our guide to everything included in the camp kitchen kit — a clip light and a headlamp are genuinely the only lighting hardware you need to add.


One Power Bank, Two Jobs: Faucet and Light
Modern camp kitchen lighting is overwhelmingly USB-rechargeable, which means it shares a charging ecosystem with the rest of your kitchen. If your kitchen box runs a USB-rechargeable faucet, the same power bank that tops off the faucet between trips tops off your lights. That's a real logistical win: one cable type, one bank, one charging routine the night before you leave.
Two habits keep the shared-power setup from biting you. First, charge lights and faucet at home, every trip, rather than counting on charging at camp — LED lights sip power, but a dead lantern at 9:00 PM helps nobody. Second, dim aggressively. Running a dimmable light at half brightness roughly halves its draw, and most of the evening you don't need full output anyway.
Since kitchen lights live outdoors next to a sink, check the IP rating before buying: IP65 is the sensible minimum for anything used around water and weather, and IP67-rated lights survive temporary immersion — up to 1 meter for 30 minutes — which covers the classic lantern-in-the-dishpan accident.
Warm Light Draws Fewer Bugs to Your Food
Every camp cook learns this one the hard way: turn on a bright bluish lantern over the prep surface and within minutes it's hosting a moth convention directly above your food. That's physics, not luck. Insects are most attracted to short-wavelength light — the blue and ultraviolet end of the spectrum — which is exactly what cool-white LEDs above 5000K emit most of.
The fix is choosing warmer light. LEDs below 3000K attract noticeably fewer insects, and in comparative testing, yellow and amber LEDs drew roughly 70 percent fewer insects than cool-white ones. Amber light sits around 590 nanometers, well away from the wavelengths bugs chase hardest. Many camp lanterns now ship with a switchable warm or amber mode — use it as your default and save the cool-white blast for the actual two minutes of knife work.
Red mode, at 620–700 nanometers, is the extreme end of the same trick: it draws the fewest insects and preserves your dark-adapted night vision, which is why it's the mode to use for a midnight water run to the tank. It's poor for cooking, though — red light makes it nearly impossible to judge meat doneness, so never rely on it at the stove.
Aim It Down: Dark-Sky Manners at the Campground

Your kitchen light is also your neighbors' problem if you point it carelessly. The National Park Service's outdoor lighting principles boil down to habits that work just as well at a campsite as at a visitor center: light only what you need, only while you need it, shield the light so it points down rather than out at the horizon, and prefer warm tones over blue-white. A lid-mounted light angled at your cutting board follows all four rules automatically; a 1,000-lumen lantern hung high and bare follows none of them.
The payoff isn't just courtesy. Aiming light down onto the work surface instead of scattering it sideways means more of your lumens land where you're cooking — so you can run a lower setting, stretch the battery, and still see the stars when you look up from the stove.
FAQ
How many lumens do I need to cook at camp?
Plan on 500 to 1,000 lumens directed at the prep and cooking surface, plus a separate softer light of 300 to 600 lumens for general camp ambiance. One light rarely does both jobs well, which is why a two-layer setup — task light on the kitchen box, warm lantern for the table — is the standard answer.
What color light is best for cooking after dark?
Neutral to cool white (4000–5000K) shows food color most accurately for knife work and doneness checks. For everything else, warmer light around 2700–3000K is more comfortable, attracts fewer insects, and still renders color well. A switchable lantern that does both is ideal.
Can I power camp lights from the same USB bank as my faucet?
Yes — that's one of the quiet advantages of a USB-based kitchen box. Rechargeable lanterns, strip lights, headlamps, and a USB faucet all draw from the same power bank, so one charging routine covers the whole kitchen. Charge everything at home before each trip and carry the bank as backup.
Does a camp kitchen box come with lighting built in?
Most kitchen boxes, including the VOZ, don't include a dedicated light — you add a clip-on light, strip, or lantern. The box still does half the work, though: the open lid provides the elevated mounting point that puts light behind and above your prep surface, right where task lighting belongs.
Will my kitchen light attract bugs to the food?
A cool-white LED will. Insects key on blue and ultraviolet wavelengths, so run your lantern in warm or amber mode near food — amber LEDs drew roughly 70 percent fewer insects in comparative tests — and keep the brightest cool-white setting for short bursts of detail work.
- Camp Kitchen Kit: Everything That's Included (and Why It Matters)
- How a USB-Rechargeable Faucet Works on a Camp Kitchen
- Using Your Camp Kitchen Lid as a Prep Surface: Counter Space Without Extra Gear
- Camp Kitchen Workflow: Setting Up Cook, Prep, and Wash Zones Around the Box
- Where to Set Up Your Camp Kitchen: Placement and Safety Rules That Actually Matter
Ready to upgrade your camp kitchen?
The VOZ Camp Kitchen includes everything you need in one weatherproof case. Sets up in 15 seconds.
Shop VOZ Camp Kitchen →