

How to Level a Camp Kitchen on Uneven Ground (Stop the Wobble Before You Cook)

A camp kitchen that rocks every time you press down on the cutting board isn't just annoying — it's a pot of boiling water waiting to slide. The good news: getting a dead-level cooking surface on ground that isn't level takes about two minutes once you know the order of operations.
Why the wobble is a safety problem, not a quirk
The U.S. Forest Service's stove guidance boils down to two blunt lines: clear the area of grasses and debris that could catch fire, and prevent stoves from tipping and starting a fire. That second line is the whole case for leveling. On a tilted burner, a tall pot of boiling water has its center of gravity leaning toward the low edge, and one bump from a hip or a dog is all it takes to send it over — onto your feet, or into dry duff as an open flame.
Even before anything falls, tilt ruins the cooking itself. In a leaning frying pan, oil migrates to the low side and pools there. Food on the high side sticks and scorches in a dry pan while food on the low side swims in oil. If your pancakes keep coming out thick on one edge and lacy on the other, your kitchen isn't level.
And the slope doesn't have to look dramatic. A tabletop about 24 inches deep that drops just one inch front-to-back is sitting at roughly a 2.4-degree tilt — barely visible to the eye, but plenty to move hot oil, roll a dropped egg off the counter, and make every pot handle drift the same direction all night.
Step one: pick ground that's close to level
Shims and leg adjustments are for fine-tuning, not for rescuing a terrible spot. Before you unfold anything, spend thirty seconds on site selection:
- Scan for the flattest patch of compacted, durable ground — packed dirt, gravel pad, or short grass. Established campsites usually have one obvious "kitchen corner" where others have cooked before.
- Clear the footprint. Kick away pinecones, branches, and loose rock down to firm soil. A leg perched on a walnut-sized stone is a wobble you'll chase all evening.
- Read the slope direction. Crouch and sight across the ground, or set a water bottle on its side and watch which way it rolls. You want to know where "downhill" is before you place the box.
- Avoid soft ground. Sand, mud, and fresh loam let legs sink unevenly as the kitchen takes weight — you'll level it once and re-level it an hour later.
Slope is only one part of choosing a spot — wind, tent distance, and traffic flow matter too, and we've covered the full checklist in our guide to where to set up your camp kitchen.

The downslope-leg-first method
Here's the technique that ends the guesswork. The mistake most people make is trying to lower the high side — but legs don't get shorter than their minimum, and digging holes for the uphill legs tears up the site. Instead, work from the low side up:
- 1. Orient the box across the slope, not down it. Put the long axis of the kitchen perpendicular to the fall line. That way only two legs need lifting instead of an awkward one-corner twist that racks the frame.
- 2. Set it down and find the low corner. Press each corner in turn. The corner that rocks or feels light is your target — gravity has already done the diagnosis.
- 3. Lift the downslope legs first. Extend the adjustable feet on the low side, or slide a shim under each low leg, until the rocking stops. Leave the uphill legs alone at full contact.
- 4. Check, then load-test. Set a pan of water on the counter (more on that below), then press down firmly on each corner the way you would while chopping. If nothing shifts, you're done. If a leg sinks, widen its footing with a flat rock or plate before adding more shim height.
The whole sequence adds well under two minutes to your setup. If you're starting from a folded box, the unfold itself is the fast part — our step-by-step guide shows how to set up a camp kitchen in under 15 seconds — so leveling is where the real setup time lives, and this method keeps it short.
Shims, levelers, and blocks: what actually works
You can level a kitchen with whatever the forest provides, but a small dedicated kit weighs a few ounces and saves crawling around looking for the perfect rock. From improvised to purpose-built:
- Flat rocks. Free and everywhere. Use broad, flat stones only — a rounded rock under a leg is a pivot, not a footing.
- Wood shims. A handful of tapered cedar shims from any hardware store lives happily in a drawer of the kitchen box. They adjust in tiny increments, which is exactly what fine leveling needs, and they double as fire starter at the end of a trip.
- Interlocking leveling blocks. The stackable plastic blocks RV owners carry add about one inch of height per block, and Camco, one of the biggest makers of them, advises keeping stacks under 4.5 inches. A short stack under two downhill legs handles slopes that shims can't.
- Screw-in leg levelers. Aftermarket threaded levelers made for camp stoves and tables (Camp Chef's fit 1.25-inch round legs) give up to about 2.5 inches of twist-to-adjust range per leg — the cleanest solution for gear you level on every single trip.
- A height-adjustable side table. If your layout includes a second surface for prep or a water jug, something like our adjustable-height folding camp side table lets you match its height to the leveled main box instead of shimming two pieces of furniture separately.


The all-in-one advantage: level one frame, not four
Here's where your kitchen architecture quietly decides how long this chore takes. A piecemeal setup — stove on one table, cutting board on another, wash bin on a third — means three or four separate structures, each with its own legs on its own patch of uneven ground, each needing its own shims. Get one wrong and your wash station drains onto your prep zone.
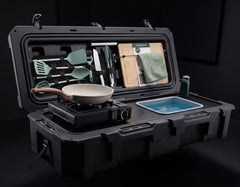
An all-in-one box like the VOZ Camp Kitchen puts the stove, sink, water tank, and prep surface on a single rigid frame. Level that one frame with the downslope-leg-first method and everything riding on it — burner, faucet, counter — is level at the same moment. It's one of the underrated reasons integrated boxes win the setup-time race so decisively, and why the cook, prep, and wash zones stay in clean relationship to each other no matter what the ground is doing underneath.


How level is level enough?
You don't need surveyor precision — you need "hot oil stays put." Three quick checks, in increasing order of fuss:
- The press test. Push down on each corner. Any rocking at all fails — stability comes before slope.
- The water-in-pan test. Pour a half inch of water into your widest pan and set it on the burner. The water tells you instantly which edge is low and by roughly how much. Shim until the waterline sits even, then dump the pan in the sink — no extra gear carried.
- The torpedo level. A 6-to-12-inch bubble level costs a few dollars, weighs a few ounces, and a standard one reads accurately to about 1/8 inch per foot — far finer than any cooking task requires. Toss one in the utensil drawer and leveling stops being a judgment call.
One more habit worth building: re-check after the first half hour. On soft or damp ground, a kitchen loaded with a full water tank and a dutch oven will settle, and legs rarely sink evenly. A ten-second press test before you start the second course catches it.

FAQ
Can I just wedge a rock under the short leg?
Yes — that's the original leveling technology, and it works fine if the rock is flat, wider than the foot of the leg, and seated on firm soil. The failure mode is a rounded or wobbly rock that turns your fix into a new pivot point. If you're improvising, flat and broad beats thick every time.
Should I level the stove or the whole kitchen?
The whole kitchen. Leveling just the stove fixes the frying pan but leaves your counter rolling vegetables downhill and your sink draining crooked. Since an integrated box carries all three on one frame, one leveling job covers everything — with separate tables, prioritize the stove first, then the wash surface.
What about sand, mud, or other soft ground?
Soft ground is a footing problem before it's a leveling problem. Put something broad under each leg — a flat rock, a leveling block laid flat, even an upside-down plate in a pinch — to spread the load, then level on top of that. Expect some settling and re-check after the kitchen is loaded.
How much slope can shims and blocks realistically fix?
Figure roughly an inch of correction from stacked shims and up to about 4.5 inches from a stack of interlocking blocks before the stack itself gets sketchy. If the low side needs more lift than that, you're not on a candidate site — pick up the kitchen and move it. Two minutes of relocation beats an evening of cooking on scaffolding.
Ready to upgrade your camp kitchen?
The VOZ Camp Kitchen includes everything you need in one weatherproof case. Sets up in 15 seconds.
Shop VOZ Camp Kitchen →