New Camp Kitchen First-Use Checklist: Sanitize the Tank, Kill the Plastic Taste, Charge the Faucet, Leak-Test the Stove

A brand-new camp kitchen is ready to cook in the time it takes to open the lid. The water side and the fuel side still need one evening in the driveway before the first trip. This is the one-time routine: sanitize the tank, get rid of the plastic taste, charge the faucet, and leak-test the stove. That way, the first thing you notice at camp is dinner, not a mouthful of water that tastes like a garden hose.
Why a New Camp Kitchen Needs a First-Use Routine
Nothing is wrong with a new kit. It just traveled a long way in a sealed box. The water tank has been through manufacturing, packing, and shipping, and it has never held potable water. The faucet battery shipped at whatever charge the factory left it with. The stove has never been connected to a canister. Each of those can cause a small problem on night one that takes ten minutes to rule out at home.
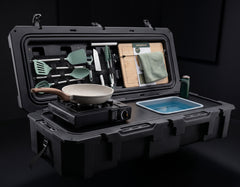
The VOZ Camp Kitchen is a good example of what you are working with. It has a food-grade LLDPE case, a removable 2-gallon water bag, a collapsible sink fed by a USB-rechargeable faucet, a single-burner butane stove, and 30-plus pieces of cookware and utensils. If you want the full inventory before you start, our breakdown of everything included in a camp kitchen kit walks through it piece by piece.


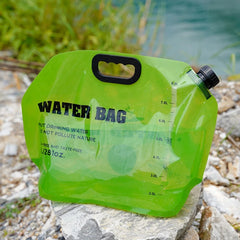
Step 1: Wash and Sanitize the Water Tank (CDC Method)
Don't trust forum ratios here. The CDC publishes a simple procedure for sanitizing a water storage container, and it works well for a removable camp kitchen tank:
- Wash first. Wash the tank with dish soap and water, then rinse it completely. Sanitizer works on clean surfaces, not on film.
- Mix the solution. Add 1 teaspoon of unscented liquid household chlorine bleach to 1 quart (4 cups) of water. The CDC specifies bleach with 5% to 9% sodium hypochlorite. Check the label, and skip scented, splash-less, and "color-safe" formulas.
- Coat every surface. Pour the solution into the tank, cap it, and shake it well so the solution touches all of the inside surfaces, including the underside of the cap and the neck.
- Wait, then empty. Wait at least 30 seconds, then pour the solution out.
- Air-dry. Leave the tank open to air-dry before you fill it with clean drinking water.
The official guidance is on the CDC's emergency water supply page. One quart of solution is plenty for a 2-gallon tank, because what matters is coating the walls, not filling the tank.
Two cautions. First, keep the bleach inside the tank. The manufacturer's care instructions for the VOZ case say to wipe the polymer body with mild soap and water and to avoid bleach on it, so rinse any splashes off the case and the countertop right away. Second, never mix bleach with vinegar or any other cleaner. The CDC warns that combining bleach with other cleaners or disinfectants can release vapors that are dangerous to breathe. If you plan to try a vinegar or baking soda rinse for taste (Step 2), do it on a different day from the bleach step, and flush thoroughly in between.

Step 2: Kill the Plastic Taste
The "my water tastes like plastic" complaint comes up again and again on overlanding and RV forums. Owners who have chased it down point to three things, and they are worth checking in order.
Check the hose before you blame the tank. On the Wander the West thread about plastic-tasting tank water, several owners found the taste came from the fill hose, not the tank. A regular garden hose is not made for drinking water. Fill your camp kitchen tank from a kitchen tap, or from a white hose sold for potable water.
Flush several times. After sanitizing, fill the tank with tap water, run some of it through the faucet, dump the rest, and repeat two or three times. Most of the "new tank" smell and any leftover chlorine leave with those flushes. If a chlorine taste lingers, the EPA's emergency drinking water guidance suggests pouring the water from one clean container to another and letting it stand for a few hours before you drink it.
Try an overnight baking soda soak if it persists. RV owners commonly report good results from dissolving about a heaping tablespoon of baking soda per gallon of water in the tank, leaving it overnight, and then flushing thoroughly. This is owner experience, not a lab standard, so treat it as optional. Keep vinegar soaks short and well flushed. One RV owner reported that a vinegar treatment followed by baking soda seemed to make the smell from their flexible water lines worse, not better.
If the water still tastes off after all that, it may be the source water and not the tank. Our guide to whether camp kitchen tank water is safe to drink covers potable vs. non-potable spigots and how long water should sit.
Step 3: Charge and Prime the USB Faucet
The faucet pump runs on a built-in rechargeable battery, and the manufacturer doesn't publish a factory charge level. Treat it like a new phone and give it a full charge before the first trip. A few habits make this safer and more reliable:
- Charge where you can see it. The U.S. Consumer Product Safety Commission advises being present while lithium-ion products charge, not charging them while you sleep or are away, and unplugging when the charge is full. The guidance targets e-bikes, but the habit costs nothing here.
- Use a normal USB charger. Use the cable that came with the faucet and a standard wall or car USB port, not a no-name fast charger.
- Prime it with real water. Once it's charged, fill the tank, drop in the pump, and run the faucet until the flow is steady and free of air. This also flushes the short hose between pump and spout, which is part of the water path your sanitizing rinse should reach.
- Put it on a calendar. The VOZ care guidance says to top up the faucet battery every 3 to 6 months even when the kitchen isn't being used. Set a reminder now, while you're thinking about it.
If the pump hums but won't move water, or doesn't run at all after a full charge, work through our faucet and water pump troubleshooting guide before your trip, not at the campsite.

Step 4: Leak-Test the Tank and the Stove
Water tank. Fill the tank all the way, cap it, and set it on a dry towel or a sheet of paper towel for an hour. Then tip it on each side for a few minutes. A damp spot under the cap or along a seam is far easier to deal with in the garage than inside a packed case. If you find one, our guide to fixing a leaking camp kitchen water tank covers which leaks you can seal and which mean a warranty claim.
Stove. Do this outdoors, away from flames and pilot lights, with the burner knob off. Install a fresh butane canister the way the stove's instructions describe, and then:
- Mix about 1 tablespoon of dish soap into 1 cup of water.
- Brush or dribble the solution onto the canister-to-stove connection and any visible fittings.
- Watch for 30 seconds or so. Bubbles that grow or keep forming mean gas is escaping.
- If you see bubbles, remove the canister, check that it is seated and lined up correctly, and reinstall it. Then test again. If it still bubbles with a new canister, don't use the stove. Contact support.
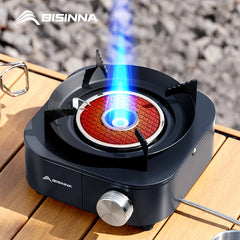
This soap-and-water method is standard camp stove safety advice, recommended whenever you change canisters or suspect a problem. Once the joint is clean, light the burner and run it for a few minutes to burn off any manufacturing residue. Do that outside too. The CDC is blunt: never use a portable gas camp stove indoors, and that includes a closed garage. Let the stove cool completely before you remove the canister.
The same soap test works on any canister stove you own. If you're adding a second burner to your setup, our camp stove collection includes several butane cassette models that take the same style of canister.


Step 5: Wash the Cookware and Pack It the Way You'll Use It
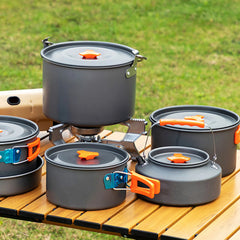
The last step is the easiest. Wash the pan, knife, cutting board, and utensils before their first use. According to the VOZ product FAQ, the utensils and pan are dishwasher-safe. Wipe the case and countertop with a damp cloth and mild soap. Then repack in the order you'll actually unpack at camp, with the stove and fuel where you can reach them, the water tank filled and seated, and the faucet charged.
Finally, fill the tank close to departure, not a week early. The CDC recommends replacing stored water every six months, but for a kitchen tank that lives in a warm vehicle, fresher is better. When you get home from that first trip, switch to our routine for cleaning the sink and water system and preventing mold. This first-use checklist is a one-time job. That routine is the one you'll repeat after every trip.
FAQ
Do I really need bleach, or is hot soapy water enough?
Soap removes residue, but it doesn't sanitize. The CDC procedure uses both: wash with soap, rinse, then a short contact with a dilute bleach solution.
Is the plastic taste harmful?
A faint taste from a new food-grade tank is common and usually fades after a sanitizing rinse and a few fill-and-dump cycles. If the taste is strong, chemical, or doesn't go away, stop drinking from the tank and check the hose, the water source, and the tank itself.
How often should I repeat this checklist?
The full checklist is for a new kitchen, or one coming out of long storage. After that, sanitize the tank whenever it has sat with water in it, top up the faucet every 3 to 6 months, and soap-test the stove connection whenever you change canisters.
Can I use bleach to clean the outside of the case?
No. The care guidance for the VOZ case calls for mild soap and water on the polymer body and says to avoid bleach. Use the bleach solution only inside the water tank.
Ready to upgrade your camp kitchen?
The VOZ Camp Kitchen includes everything you need in one weatherproof case. Sets up in 15 seconds.
Shop VOZ Camp Kitchen →